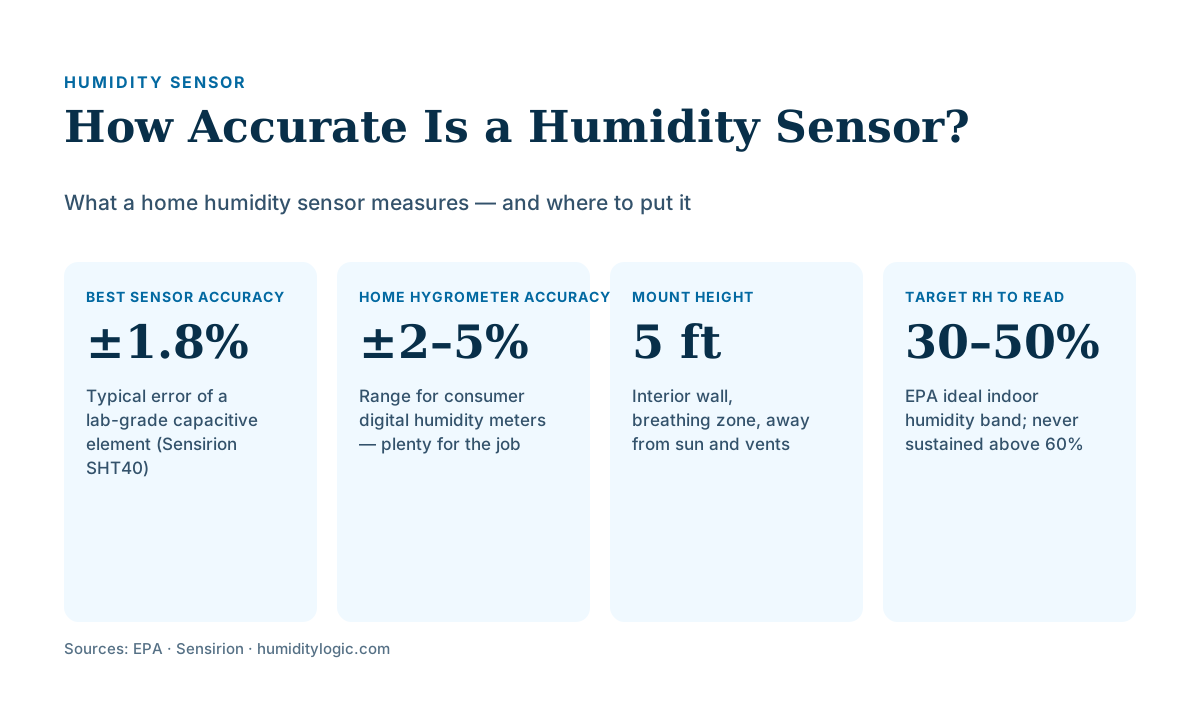
A humidity sensor is the electronic element that measures relative humidity, usually a capacitive or resistive hygrometer that turns moisture in the air into a readable RH percentage. Good sensors are accurate to about ±2–3% RH, and lab-grade parts reach ±1.8%. For a number you can trust, mount the sensor on an interior wall roughly 5 feet up, away from sunlight, vents, and steam.
What Is a Humidity Sensor?
A humidity sensor is the small component that detects how much water vapor is in the air and outputs a signal a device can read as relative humidity. It is the sensing element, not the whole gadget. That distinction matters: the humidity sensor is the part, while a humidity meter — the device most people call a hygrometer — is the finished product that houses the sensor, processes its signal, and displays a percentage on a screen.
Almost every humidity reading in a home comes from one of these elements. The $12 digital hygrometer on a basement shelf, the humidity number on a smart thermostat, and the sensor buried in an HVAC controller all rely on the same core technology. Most report relative humidity (RH) — the percentage of moisture the air holds compared with the maximum it could hold at that temperature — which is why a good sensor also measures temperature. To turn RH into the muggy-versus-dry feel people actually notice, that reading gets paired with temperature to find the dew point, the subject of our guide to dew point vs. humidity.
How Does a Humidity Sensor Work?
Most modern humidity sensors work by exposing a moisture-absorbing material to the air and measuring how its electrical properties change as it takes on water. Two designs dominate, and they differ in what property they track.
A capacitive sensor places a thin polymer film — typically polyimide — between two electrodes, forming a tiny capacitor. As the film absorbs water vapor, its dielectric constant rises and the capacitance changes in near-linear step with humidity. The circuit reads that shift and converts it to an RH value. Capacitive sensors respond fast, typically within 5 to 30 seconds, work across the full 0–100% RH range, and drift very little — often under 0.5% RH per year. They are the standard in almost all new consumer and building products.
A resistive sensor instead uses a hygroscopic film whose electrical resistance falls as it absorbs moisture. It is simpler and cheaper to build, but the response is nonlinear, the useful range is narrower (roughly 20–80% RH), and it drifts faster, on the order of 1–2% RH per year. Resistive elements mostly survive in low-cost or legacy devices. Either way, the raw electrical change is only half the job — onboard electronics correct for temperature and translate the signal into the clean percentage you read.
| Feature | Capacitive sensor | Resistive sensor |
|---|---|---|
| What changes | Capacitance of a polymer film | Resistance of a hygroscopic film |
| Typical accuracy | ±1.5–3% RH | ±3–5% RH |
| Measuring range | 0–100% RH | ~20–80% RH |
| Long-term drift | Under 0.5% RH per year | 1–2% RH per year |
| Best for | Thermostats, quality hygrometers, HVAC | Budget and legacy devices |
How Accurate Is a Humidity Sensor?
Expect about ±2–3% RH from a decent sensor, with the best capacitive parts reaching ±1.8% RH. Accuracy is the gap between what the sensor reports and the true humidity, and for home use that band is more than precise enough — the difference between a healthy 45% and a mold-friendly 65% is 20 points, far wider than any error. Sensirion’s widely used SHT40, for example, is rated at ±1.8% RH typical across a 0–100% range, with a maximum error near ±3.5%.
Two things erode accuracy over time. The first is drift: sensing films age, so even a good capacitive element loses a fraction of a percent of accuracy per year, while cheaper resistive parts slip faster. The second is contamination — dust, cooking grease, and volatile chemicals coat the film and bias readings. That is why a five-year-old bathroom hygrometer often reads high. Many standalone units can be checked with a saturated-salt test, which holds the air at about 75% RH inside a sealed jar so you can compare and adjust. The practical takeaway: trust the trend and the range, not the last decimal. A sensor telling you the basement sits at “about 62%” is doing its job even if the truth is 60% or 64%. For what those numbers mean, see what is considered high humidity.
Where Do Humidity Sensors Show Up?
Humidity sensors hide inside far more products than the standalone hygrometer most people picture. The same element appears across the home:
- Hygrometers and weather stations — the dedicated humidity meters you place in a room, basement, or greenhouse to spot-check RH.
- Smart and programmable thermostats — many now display indoor humidity and can trigger a fan or dehumidifier when RH climbs.
- HVAC and dehumidifier controls — built-in sensors let systems hold a humidity setpoint, and a whole-house unit uses one to decide when to run, as covered in our whole-house dehumidifier guide.
- Smart-home devices — leak detectors, air-quality monitors, and room sensors report humidity to an app and can automate alerts.
- Appliances and cars — clothes dryers, refrigerators, and vehicle climate systems use humidity sensors to run more efficiently or defog windows.
Wherever it lives, the sensor’s value depends on where it sits in the room — which is the part homeowners most often get wrong.
Where Should You Place a Humidity Sensor for Accurate Readings?
Put the sensor on an interior wall about 5 feet off the floor, in open air, away from anything that creates a local hot, cold, or damp spot. The goal is to sample the air the room actually breathes, not a microclimate. Manufacturer guidance is consistent: Honeywell, for instance, tells installers to mount indoor sensors around five feet up on inside walls and to avoid direct sunlight, air vents, and spots behind furniture or doors.
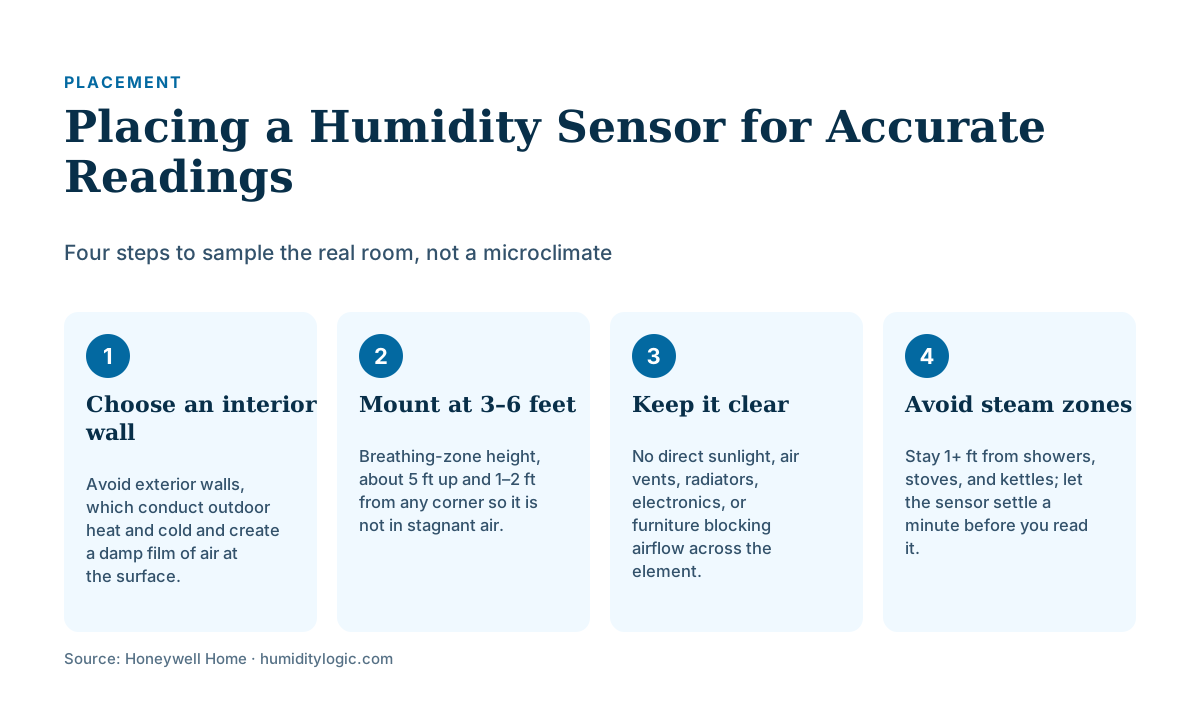
The reasons behind each rule are simple physics. Direct sunlight heats the sensor and can throw the temperature reading off by a wide margin, dragging the RH calculation with it. Exterior walls conduct outdoor heat and cold through the structure, creating a damp or dry film of air right at the surface that does not reflect the room. Air vents, radiators, and electronics blow conditioned or warm air across the element and mask the true room condition. Steam sources — showers, stoves, kettles, laundry — spike local humidity far above the room average, which is exactly why a bathroom reading looks alarming minutes after a shower.
A few practical placements: keep the sensor at least a foot or two from any corner so it is not sitting in stagnant air, and give it a minute to settle after you move it before trusting the number. If you are diagnosing a specific damp room — a basement or crawl space — measure there, but understand you are reading that space, not the house. Our guide to ideal indoor humidity levels explains the target the reading should land in, and if you are placing the sensor to manage a dehumidifier, pair it with the advice in where to place a dehumidifier.
What Reading Should the Sensor Show?
A well-placed sensor should read between 30% and 50% RH, and it should not sit above 60% for long stretches. That is the EPA’s recommended range for keeping mold, dust mites, and condensation in check — the agency advises holding indoor RH below 60% and ideally in the 30–50% band. The EPA also notes that a combined humidity-and-temperature gauge costs less than $50, which makes a second sensor a cheap way to sanity-check the first.
Read the number in context. A brief jump to 65% while a pot boils is meaningless; a basement parked at 62% every afternoon in July is a real moisture problem to solve. Check the reading in the middle of the day, away from cooking and bathing, and watch the pattern over several days rather than reacting to one figure. You can turn a reading into a comfort verdict with our humidity comfort checker, which factors temperature into whether that percentage actually feels muggy, dry, or just right.
The sensor is only ever as good as its placement. Get the element on an interior wall at breathing height, keep it clear of sun, vents, and steam, and a $15 hygrometer will tell you everything you need to know about your home’s humidity — accurate to within a couple of percent, which is all the accuracy the decision ever required.
Frequently asked questions
What is the difference between a humidity sensor and a humidity meter?
The humidity sensor is the tiny element that actually detects moisture in the air, usually a capacitive or resistive component. A humidity meter — often called a hygrometer — is the finished device that houses that sensor, reads its signal, and shows you a percentage on a display. Every home humidity meter contains a humidity sensor.
How accurate are home humidity sensors?
Consumer digital hygrometers are typically accurate to about ±2–5% RH, which is good enough to tell a healthy 45% from a risky 65%. Lab-grade capacitive sensors like the Sensirion SHT40 reach ±1.8% RH. Resistive sensors are cheaper but less precise, usually ±3–5% RH.
Where is the best place to put a humidity sensor?
Mount it on an interior wall about 5 feet off the floor, in open air away from direct sunlight, air vents, radiators, and furniture. Keep it at least a foot from showers, stoves, and exterior walls, which create local damp or cold spots that skew the reading away from the room average.
Can you calibrate a humidity sensor?
Many standalone hygrometers can be checked against a known reference, most simply with a saturated salt test that holds the air at about 75% RH inside a sealed container. Built-in sensors in thermostats usually offer a small offset adjustment in their settings menu rather than a full calibration.
What humidity reading should a sensor show in a house?
Aim for a reading between 30% and 50% RH, and never sustained above 60%. That is the range the EPA recommends for controlling mold, dust mites, and condensation. Brief spikes after a shower or while cooking are normal and do not mean the sensor is wrong.
Sources & references
Every figure on this page is checked against these published sources. Last reviewed July 21, 2026.